In the last Metacamp by Metadrop, where we got together for a week to focus on contributions, internal projects, and various games, we organized a very special activity: we built a remote-controlled boat.
The goal was to foster cooperation, stimulate creativity, and strengthen our collective problem-solving skills. During the activity, every member of the team was actively involved in all stages of the process, from design and planning to construction and the exciting moment of testing it in the water. This experience not only promoted problem-solving and collaboration but also served to strengthen bonds among colleagues, creating an environment of trust and camaraderie. Additionally, these in-person days allow team members to break out of their daily routine, share ideas in a relaxed setting, and get to know each other more closely, contributing to a solid organizational culture and a more united, motivated team—especially since we work fully remotely.
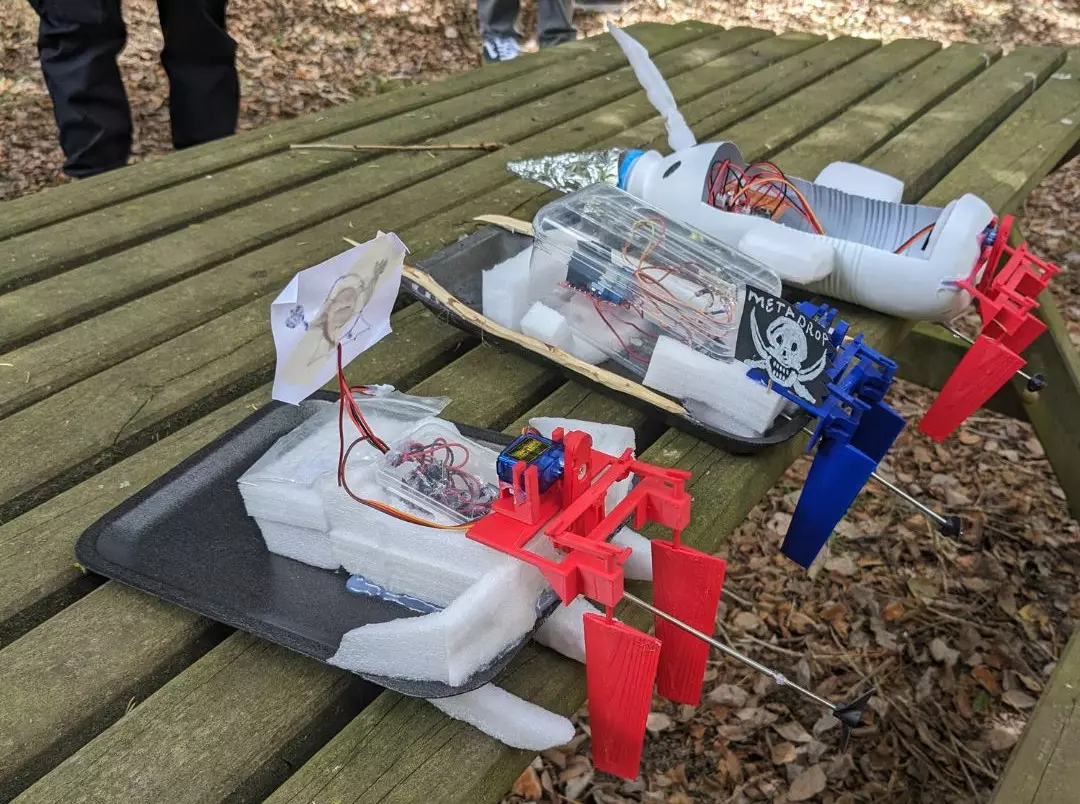
In line with Metadrop's commitment to sustainability and the DIY philosophy, everyone was encouraged to use recycled materials to create the boat’s structure. Each team received a motor and a rudder. The challenge was to transform these basic components into a functional, aesthetic, and entertaining vehicle.
Under Metadrop’s values, which highlight the commitment to Open Source, you’ll find instructions at the end of the article to replicate the project!
Competition and values: cooperation and innovation
Perhaps the most challenging aspect of the competition was choosing the materials and the design, as we were limited to our recycling bin—this is where each team’s ingenuity really shined.
Moreover, the challenge was not only the limitation of materials, but also achieving stability without compromising the maneuverability and agility of the vehicle. Some teammates, to achieve the desired buoyancy, opted for a catamaran using juice cartons.
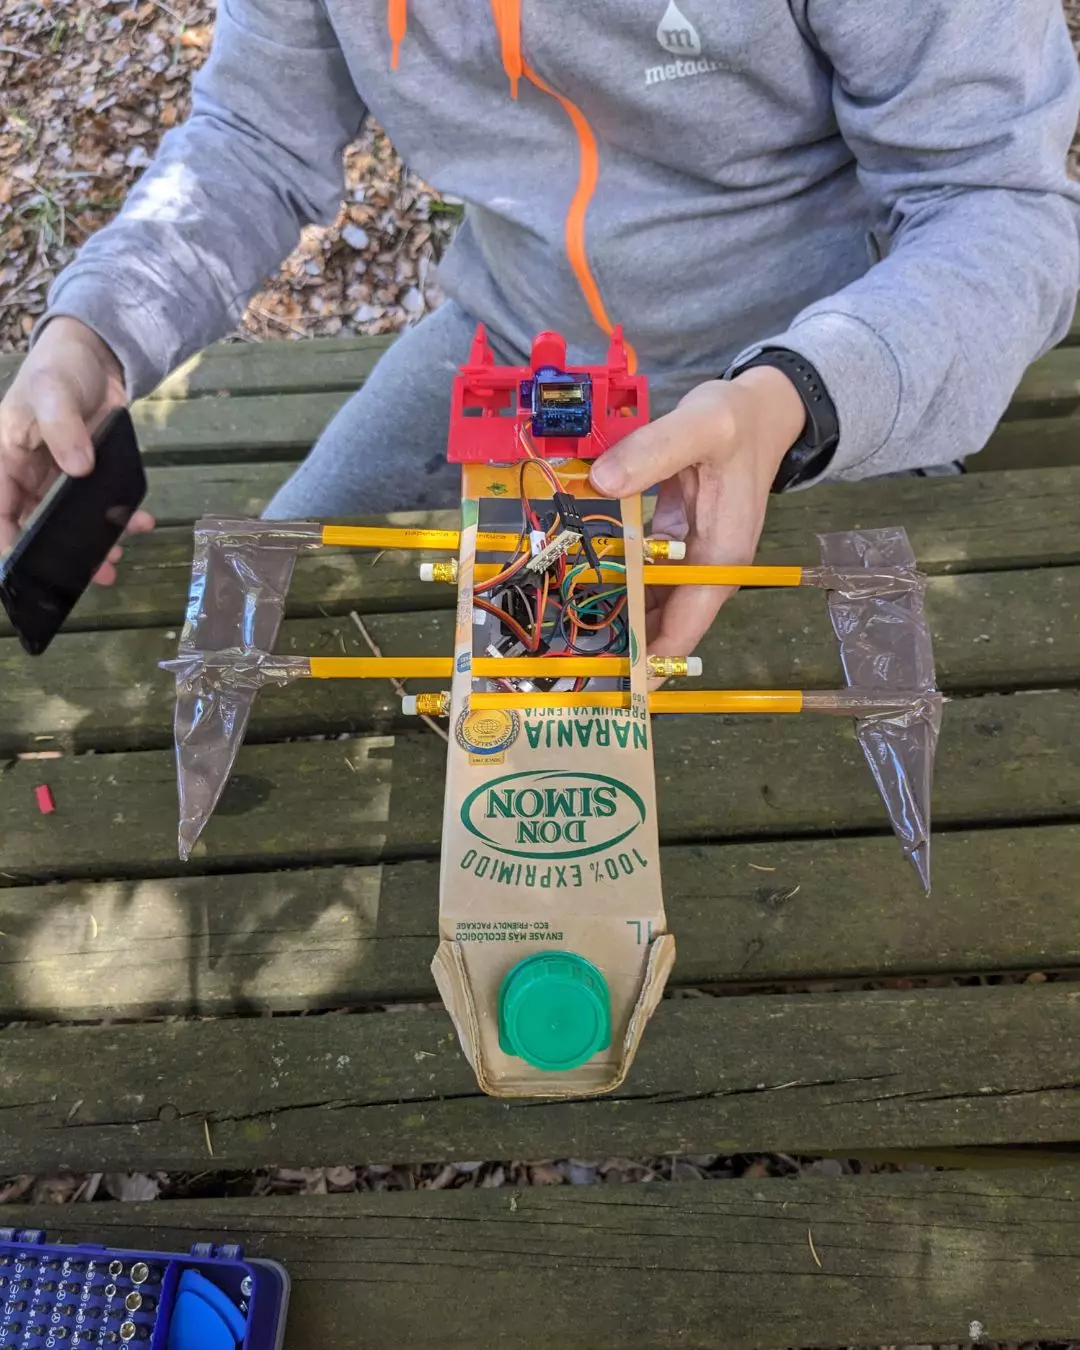
Others chose to use just a single bottle, where the weight had to be well distributed so their boat wouldn’t sink at any turn. Still others decided to build a pirate-style boat using a polystyrene tray as the hull.
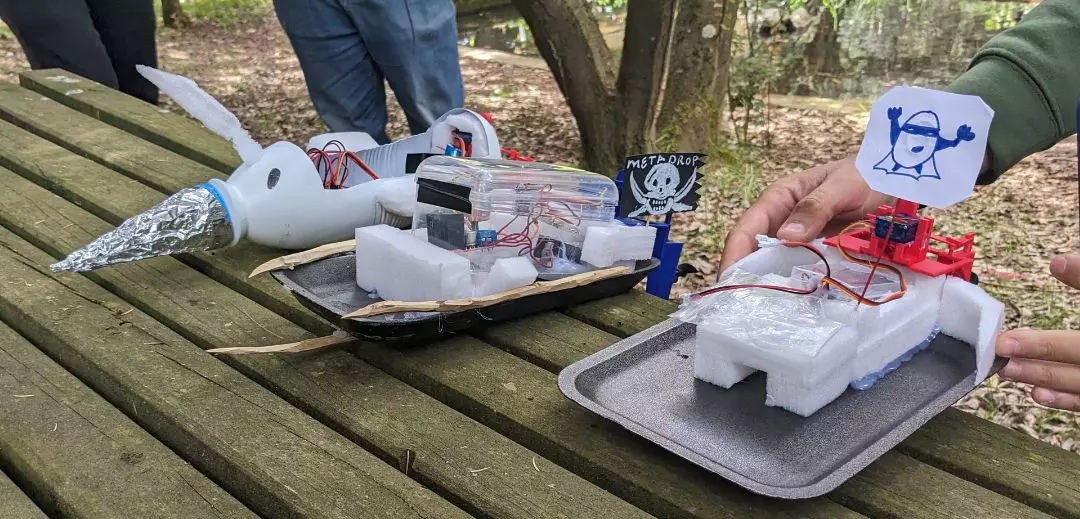
After an intense session of assembly and adjustment, we tested the boats in two challenges:
- Maneuverability course: the boat had to be piloted along a small “aquatic track” to demonstrate turning and control skills, where in some sections—due to shallow depth and rocks—the boat could run aground if the pilot wasn’t skilled enough.
- Straight-line speed: a sprint competition at maximum power to see which boat was the fastest.
Additionally, as a bonus, the most original and creative appearance was also awarded. The result was a very fun activity in which the cooperation and ingenuity of each team stood out even more than the competition itself.
Here is a video showcasing the results of the experience:
How to make your own boat? Basic construction principles
Surely, after seeing the results, you need to know how to build your own boat. Fortunately, one of Metadrop’s core pillars is openly and freely sharing knowledge. Therefore, for anyone who feels inspired to replicate the experience, we’ve provided a guide below explaining the ESP32 BLE Motor and Servo Control project, in which Metadrop and Omnia Makers actively collaborated.
1. Key components
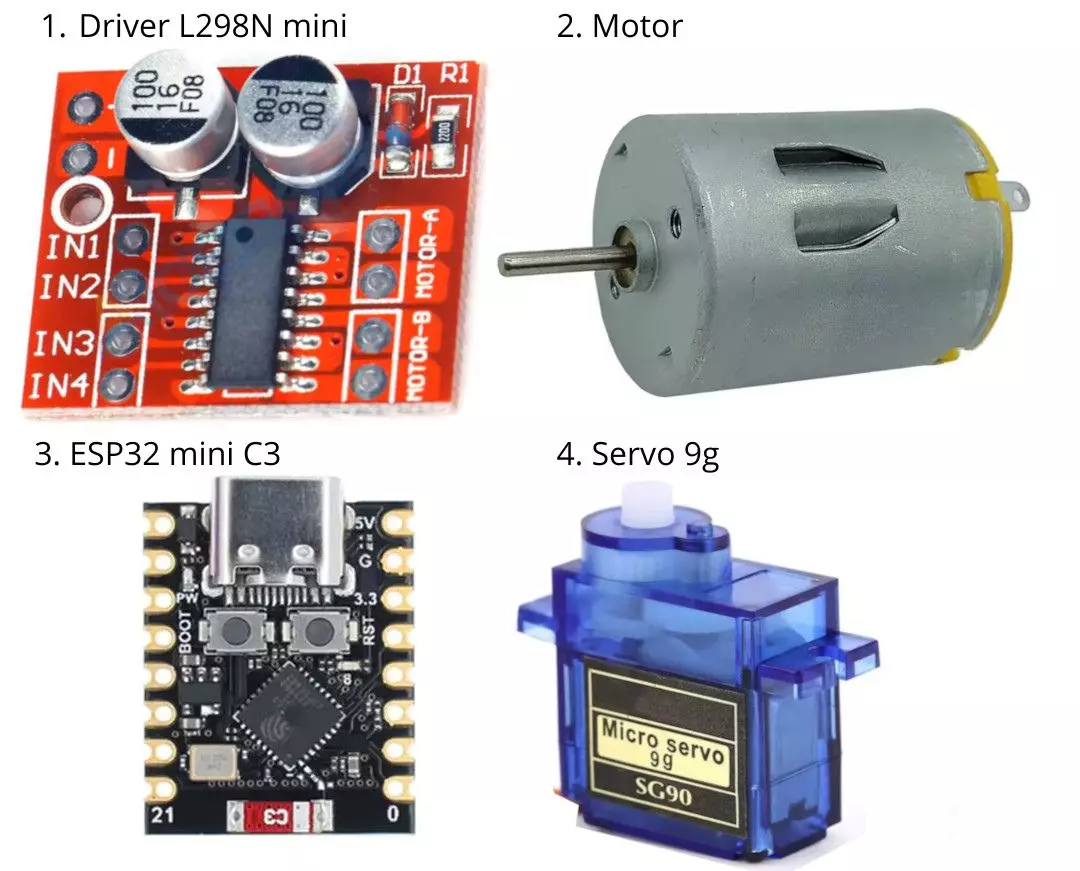
- L298N Mini Driver: controls the direction and speed of the motor.
- Motor: a brushed motor.
- ESP32 Mini C3: This microcontroller, with BLE capability, is the “brain” that sends orders to the motor and the servo to steer the boat. The software also supports the ESP32 controller, but we chose the mini version to reduce power consumption.
- 9g Servo Motor: enables the rudder to tur. It also can be MG90S, but it needs 5v.
- Power supply: ensures the necessary power, especially if your motor has high consumption; it should provide between 3.7V and 12V.
- Boat steering: The files are available to download from MakerWorld.
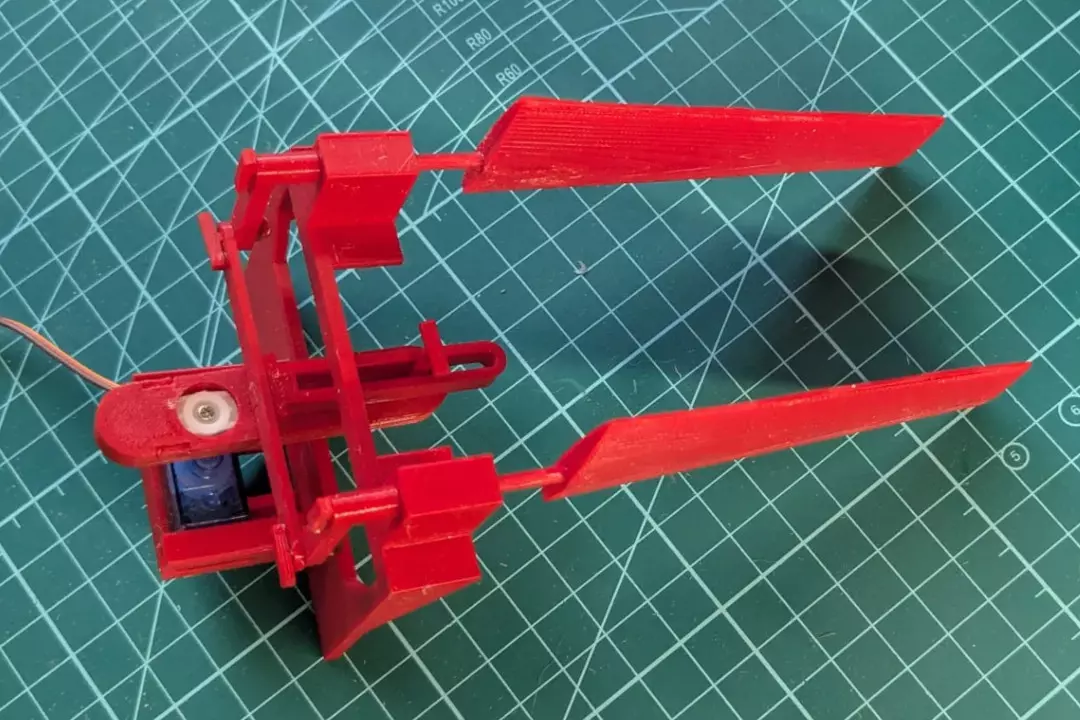
- Floating hull and recycled materials: bottles, juice cartons, food trays, or cork can serve as the base for creating the floating structure.
2. Wiring and connections
The ESP32 Mini C3 must be connected to the L298N Driver and the servo according to the following guidelines:
- Motor: The L298N requires two control pins for the propulsion motor (GPIO 0 => H-Bridge IN1 and GPIO 10 => H-Bridge IN2). You can change the pins in the power.cpp file, and the power supply can range from 3.7V to 12V.
- Servo: needs a PWM signal pin (for example, GPIO 2). You can change the pin in the servo.cpp file, plus power connections (5V and GND shared with the board).
- Power and common grounds: it is vital that at least the ground (GND) is shared among the ESP32, the driver’s power supply, and the servo, to ensure the signals work correctly.
Wiring schema 5v and servo MG90S:
           +5 V Pila
            + o
            |
   ┌────────┴────────┐
   │                 │
   │   ESP32-C3      │
   │   Mini          │
   │  VCC •••••••••––+––––––––––[+]
   │  GND •••••••••––+––––––––––[–]
   │  D2  •••–––––––––––––––––––––> Servo MG90S PWM
   │  D10 •–––––––––––––––––––––––> L298N IN1
   │  D0  •–––––––––––––––––––––––> L298N IN2
   └─────────────────┘
            |
            + o
           GND
            +5 V Pila
            + o
            |
   ┌────────┴────────┐
   │                 │
   │   L298N Mini    │
   │                 │
   │  VIN •••••••••––+––––––––––[+]
   │  GND •••••••••––+––––––––––[–]
   │  IN1 •<––––––––––––––––––––– D10 (ESP32)
   │  IN2 •<––––––––––––––––––––– D0  (ESP32)
   │  Motor A •––––––––––––––––––> Motor terminal 1
   │  Motor B •––––––––––––––––––> Motor terminal 2
   └─────────────────┘
            |
            + o
           GND
            +5 V Pila
            + o
            |
   ┌────────┴────────┐
   │                 │
   │  Servo MG90S    │
   │                 │
   │  VCC •••••••••––+––––––––––[+]
   │  GND •••••••••––+––––––––––[–]
   │  PWM •<––––––––––––––––––––– D2  (ESP32)
   └─────────────────┘
            |
            + o
           GND
3. Software setup
The software was originally based on ESP-IDF, which is the framework supported by Espressif for ESP32 microcontrollers, but the project has been migrated to Arduino so that development and tracking would be simpler.
The repository includes a main sketch (connect.ino) that sets up BLE (Bluetooth Low Energy) communication, processes commands from a compatible web client or mobile application, and translates them into movements for the servo and the motor.
Moreover, the client folder provides a simple web client that uses the Web Bluetooth API to discover the device and send instructions. The code separates logic into several files:
- DataParser: interprets incoming commands.
- power: controls the motor via the L298N.
- servo: manages the servo using PWM signals.
- bluetooth: handles the Bluetooth connection.
Device name: METALANCHA (configurable in bluetooth.h). If there are several devices running simultaneously, this name must be unique to each device.
4. Remote control and startup
- Upload the sketch to the board: load connect.ino onto your ESP32. This can be done using the Arduino IDE.
- Power supply: connect your boat to a source of between 3.7V and 12V.
Web client or BLE app: from your phone or a Bluetooth-enabled computer, connect to the ESP32 using the provided client (or your own) and start sending commands. The client included in the repository offers two joysticks—one for steering and one for motor control.
The boats in action
Available commands in the API:on/offto turn the motor on or off.y 200to set the motor power.x 45to turn the servo to 45° and control the rudder.testservoto check that the servo works.testpowerto check that the motor works.
- Buoyancy tests and adjustments: verify that your boat’s structure is stable and that the rudder (servo) rotates sufficiently to steer.
Conclusions
The experience of assembling remote-controlled boats taught us a great deal about teamwork, creativity, and technical ingenuity. Furthermore, the activity proved to be a success in terms of participation and involvement of the attendees, reinforcing the spirit of collaboration that we value so highly at Metadrop.
We invite you to put these steps into practice, experiment with different recycled materials, and share your achievements. Whether for a personal project or for an event in your organization, showing participants how to create their own devices and engage in friendly competition is a great way to learn and have fun at the same time.
If something isn’t working for you or you’d like to improve it, feel free to contribute! Or if you just want to leave a comment or anecdote, feel free to send us your feedback.
Go ahead and build your own boat and join the maker community!
Resources
Repository with code compatible with ESP32
Files to 3D print the boat’s rudder
