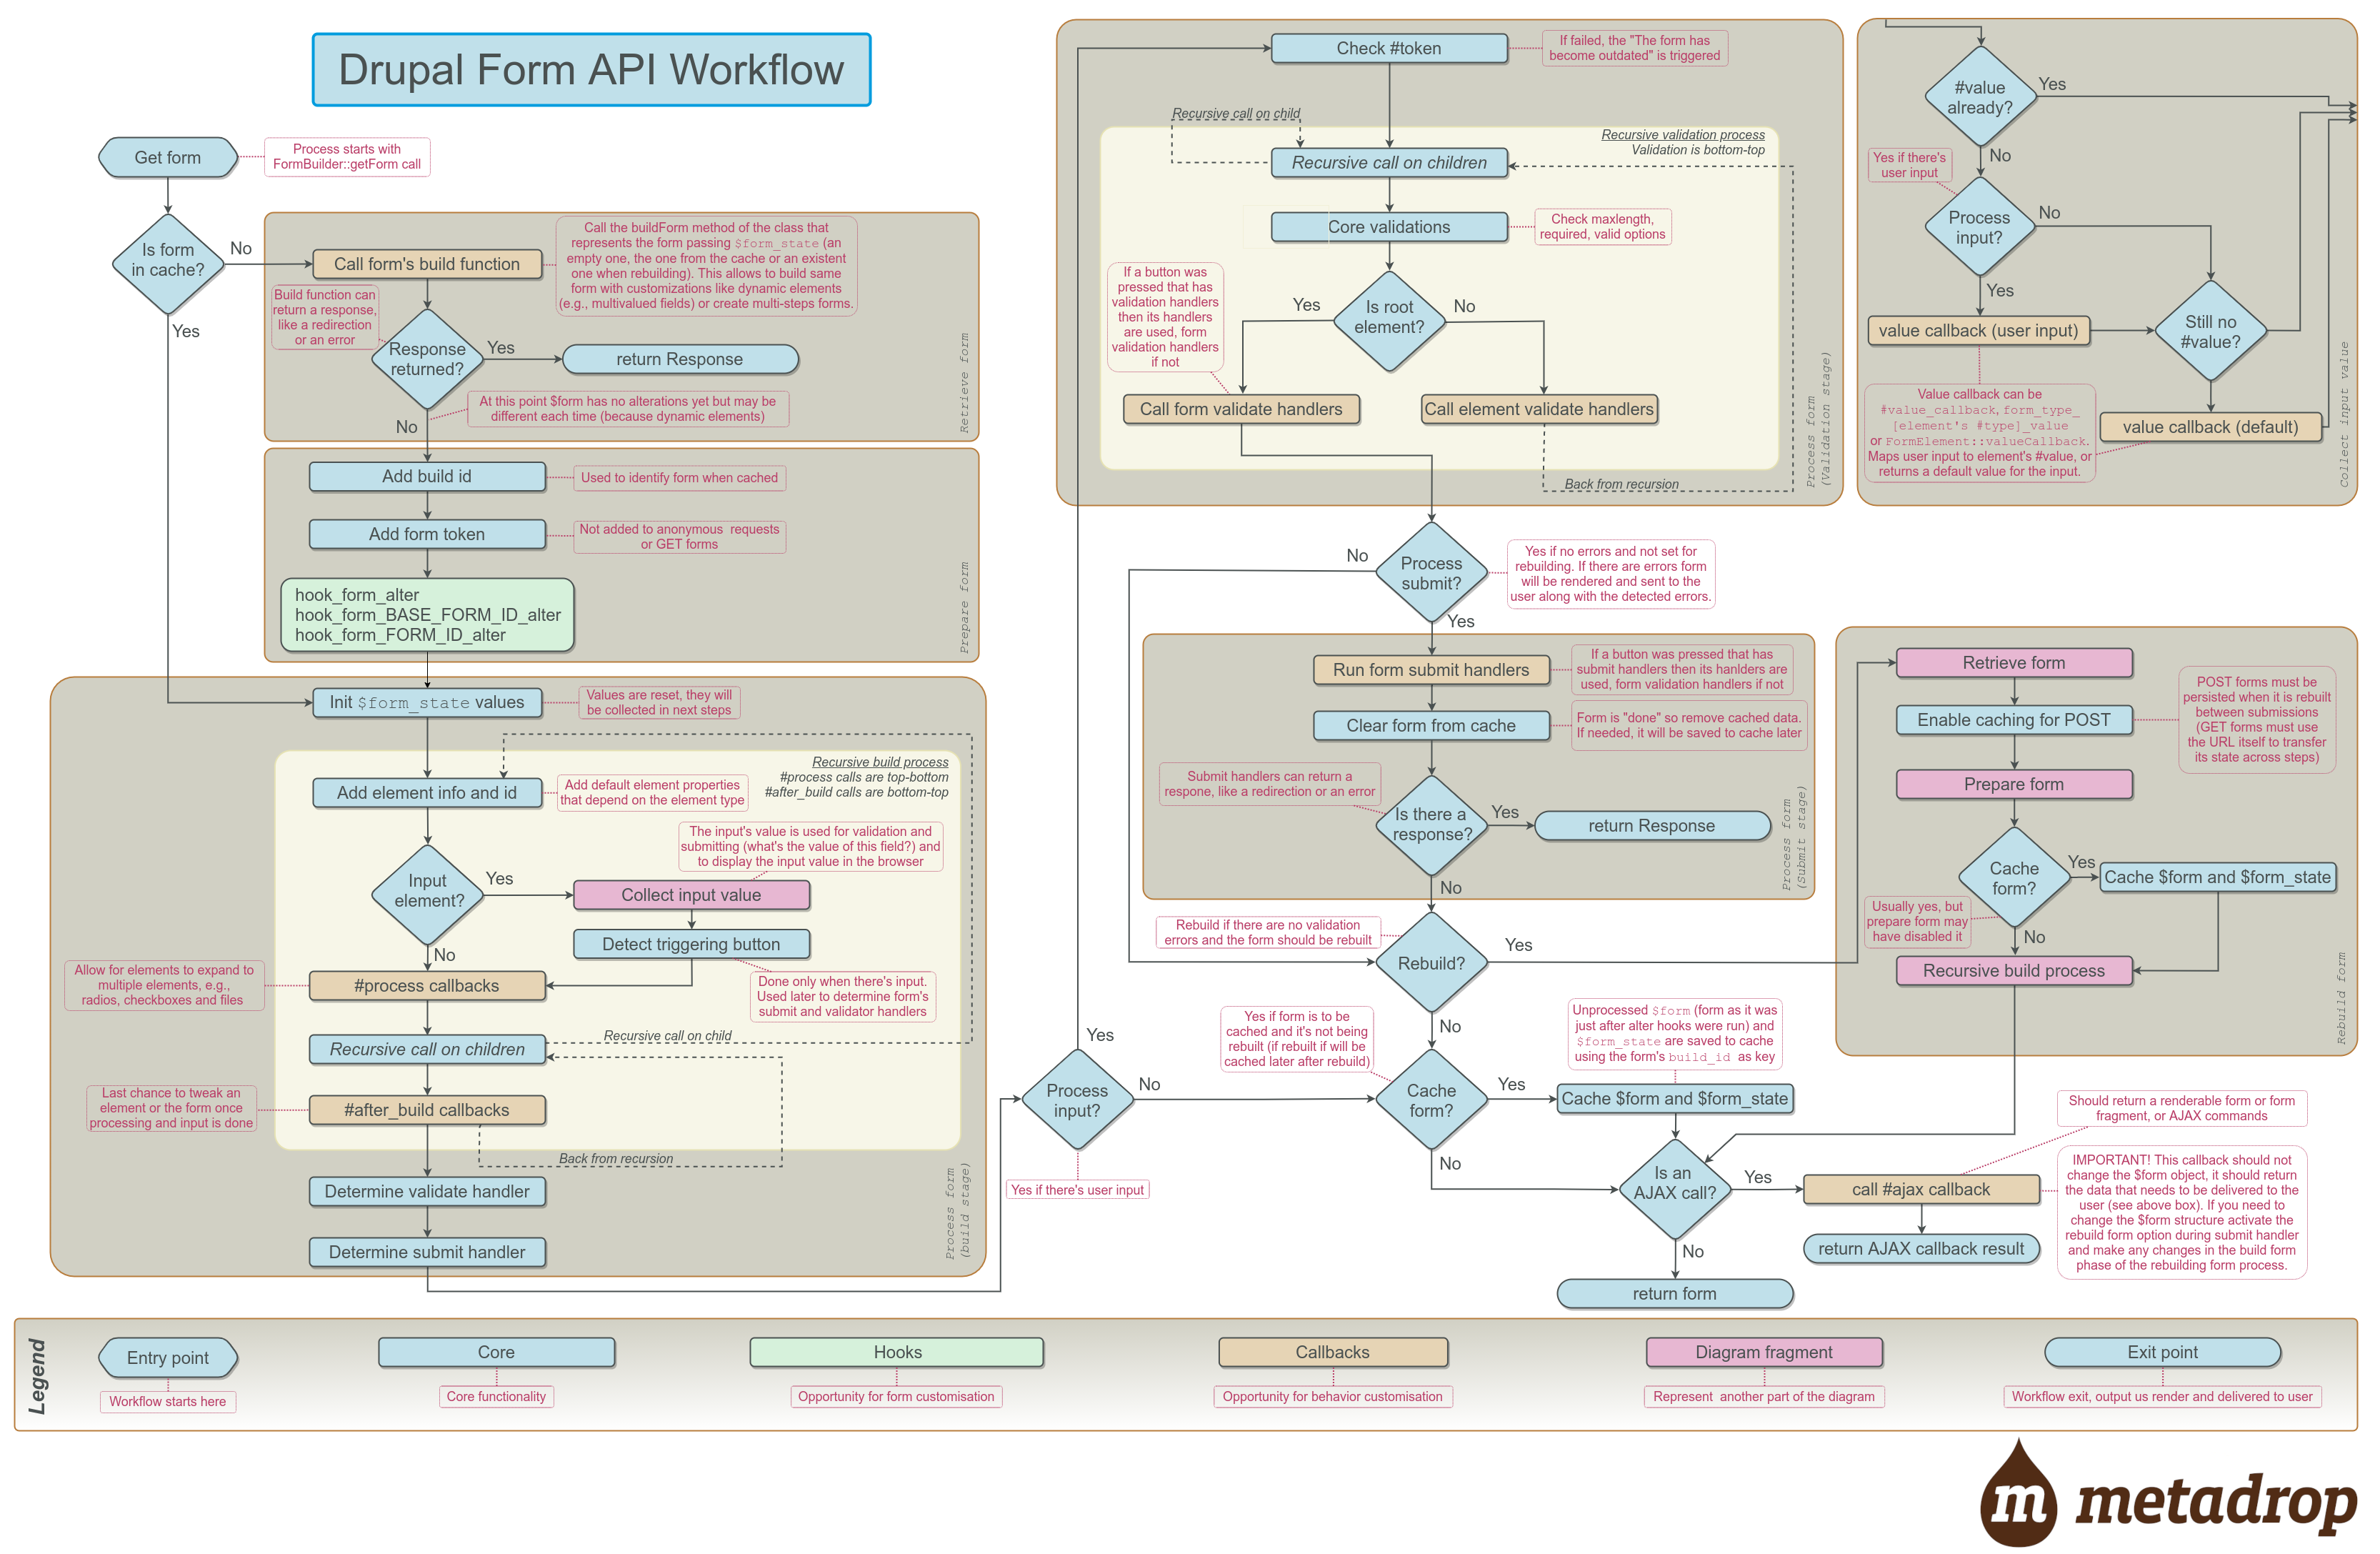
This year my session on the Form API workflow was selected for DrupalCon Prague. I was thrilled when I received the message that it had been selected, as to be honest, I have proposed the session at least four times (for Drupal Dev Days and the previous DrupalCons). Ever since I drew the Drupal 7 Form API workflow illustration years ago, I wanted to create a new one for Drupal 8, but I didn't find the time, so I decided to submit it to a Drupal event. Having a deadline is always a great push to do something.
The form API at the DrupalCon Prague
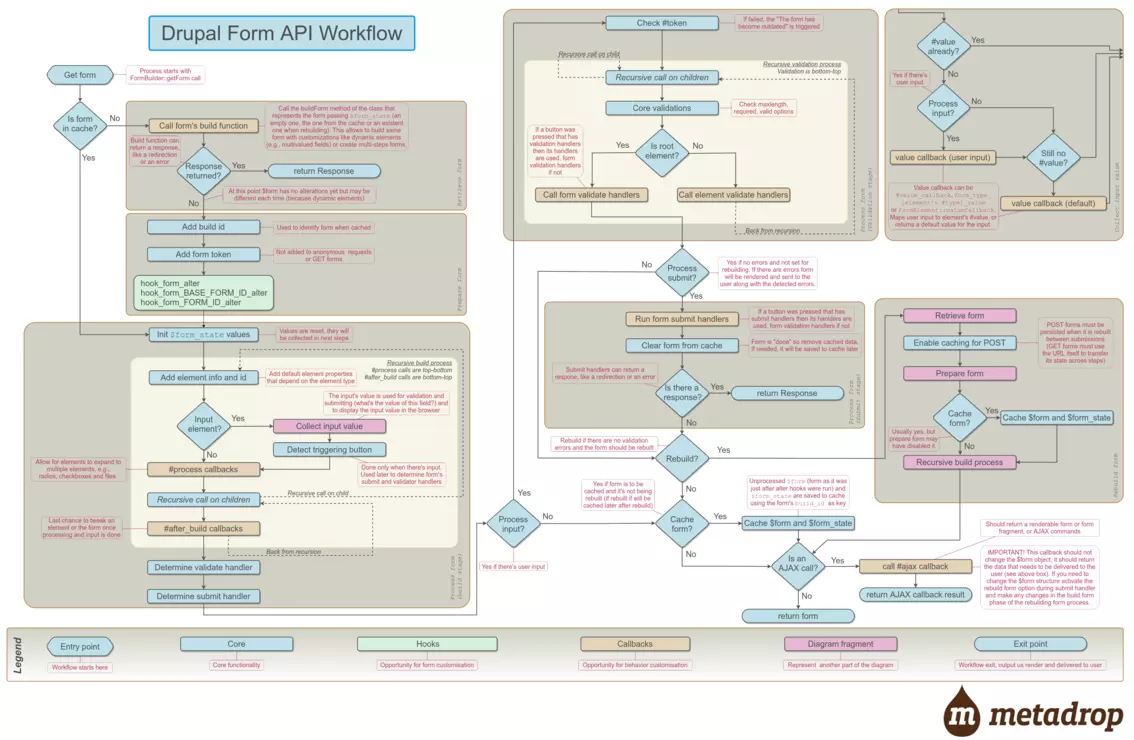
Here you have the high resolution version of the illustration.
A bit complex, isn't it? Don't worry, once you start to familiarize yourself with it, begins to be less overwhelming. So let's start to learn about it.
First, let's check the legend. There are 6 different types of rectangular boxes, each one being a different type of step in the workflow:
- Entry point: there is only one entry point and it is where workflow starts. When Drupal needs to process a form it starts here.
- Core: those are standard steps of Drupal core. Each box represents an action that Drupal takes on the form, like adding a value, saving to cache, or determining some information about the form.
- Hooks: there is only one place where hooks are called (all form hooks) and is this one. Most form structure and behavior alterations are done in form hooks, although callbacks allow further customization.
- Callbacks: these boxes are where Drupal calls a callback, like a validation handler or any other related functions that can be attached to the form at certain points. Those callbacks allow for more customization of the form behavior and structure.
- Diagram fragment: each box of this type represents a certain part of the Form API workflow that you can find in another part of the diagram. It is a way to make the diagram less cluttered. When you find one of these boxes just look for the light gray-brown panel with the same name on the bottom-right side.
- Exit point: these are the points where the Form API workflow can exit the process.
Second, see the diamond-shaped blue elements? Each one is a decision, a check Drupal does to decide which path to follow.
Each step is connected by one or more arrows to other steps or decisions, displaying the different workflow paths. Together, steps and decisions describe the complete workflow.
A special case are the two ivory panels and the dotted arrows. They represent recursive calls. The Form API walks the $form array during building and validation and this is the way to express this action in the workflow.
Additionally, the light gray-brown panels are step groups under a name to be referenced by the diagram fragment boxes commented above. This way the diagram is easier to read.
Finally, we have the red-dotted boxes. The diagram can still be confusing: the labels of the different steps and decisions are not enough to get all the important information. That is why I added these red-dotted boxes, which are comments that clarify something relevant that is not obvious by simply reading the diagram.
The illustration is also available in Drupal.org, in the Form API documentation section.
There is a repository open to collaborations with the diagram in different formats, including an editable one.
There is a lot more information in the session slides. In the session, I explain how to create complex webforms by leveraging the Forms API, the details of the different stages of the workflow, and some tips you should know when dealing with forms..
I hope this helps developers to better understand the Form API workflow and ease form development.
Image

Ricardo Sanz
CTO